ReDEUX: second-hand objects enjoying a second life

ReDEUX projects generally cost no money.

ReDEUX projects have caused me to knock on strange doors and ask for people's trash off the street.

ReDEUX projects make me happier than anything.

Objects always have the potential to be repurposed.

Entries in Christmas (10)

Sunday
Dec302012

Christmas Salt Shakers $0

My mother-in-law gave me these shakers when she cleaned out her craft room. My sister Suz sent me an Etsy purchase called "Lot of 100 Vintage Christmas Smalls" that was basically a gallon-sized Ziploc bag full of Christmas trinkets. I decided to put green marbles in one shaker and red things in the other. They hung out together on my kitchen table all December. Cute.

I might do this for every holiday. Little robin eggs and feathers for Easter, red + white + blue things for July 4, black + orange things for Halloween, acorns and nuts for Thanksgiving...the possibilities are endless.

Friday
Nov302012

Coaster Wreath From Old Christmas Cards $0


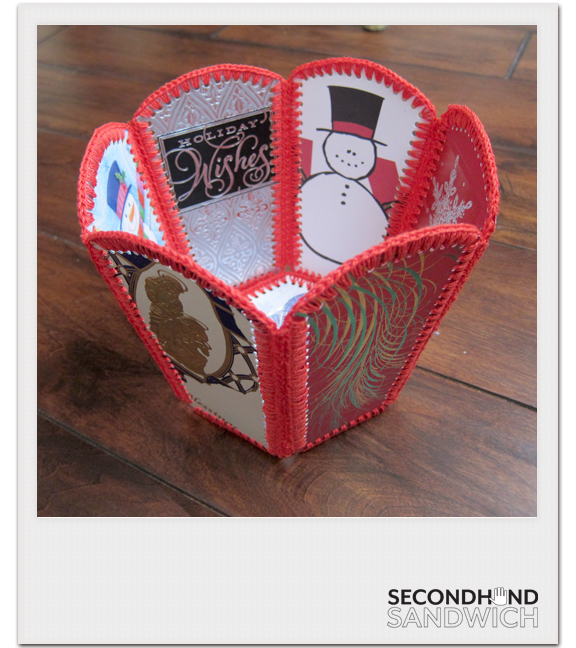
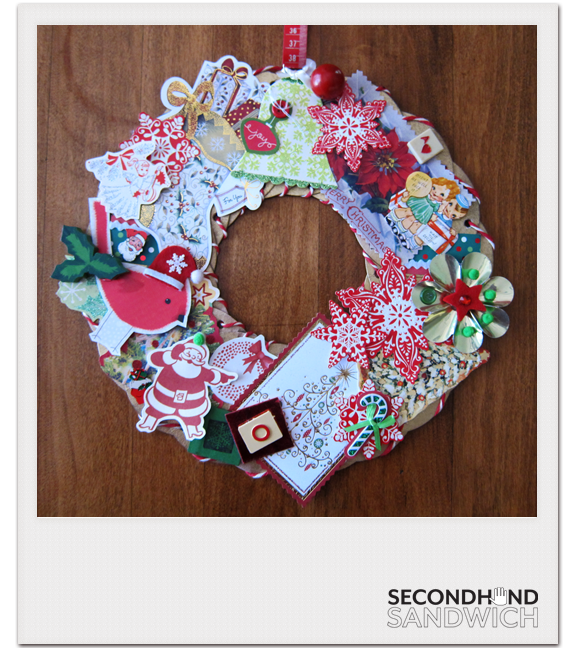
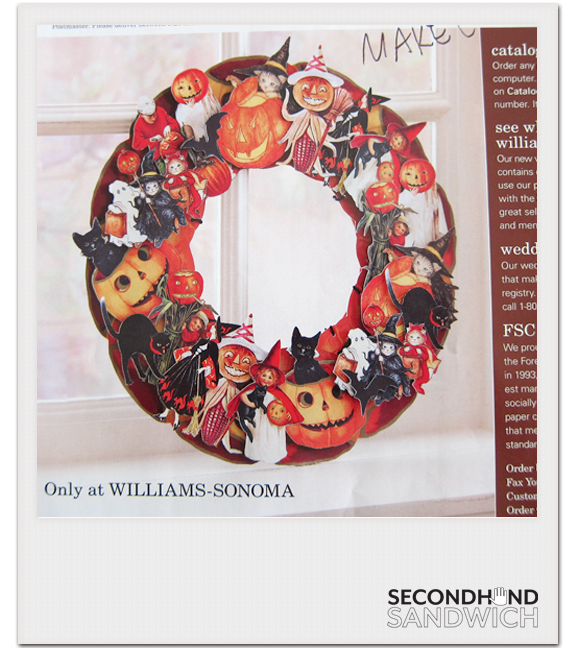
Remember my affinity for coasters? I still had a stash of square Texas Roadhouse ones. I was looking through my THINGS TO MAKE folder and found this ripped out page from a Williams-Sonoma catalog:

 I realized that I could make this in a Christmas motif with stuff I already had.


    Materials needed:

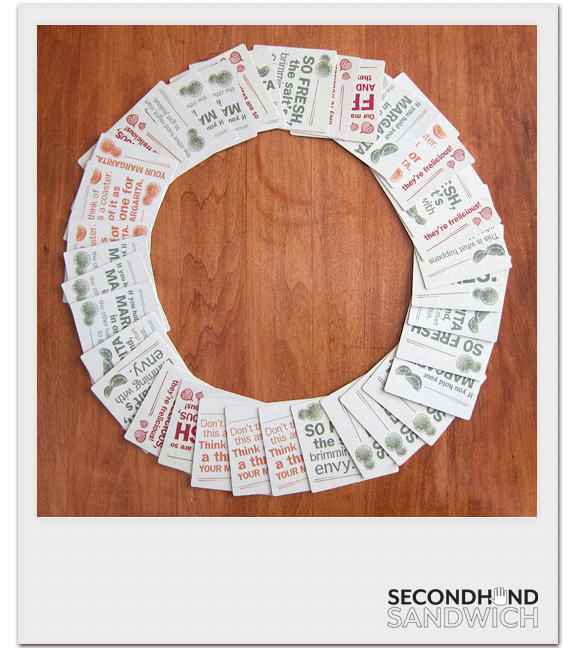
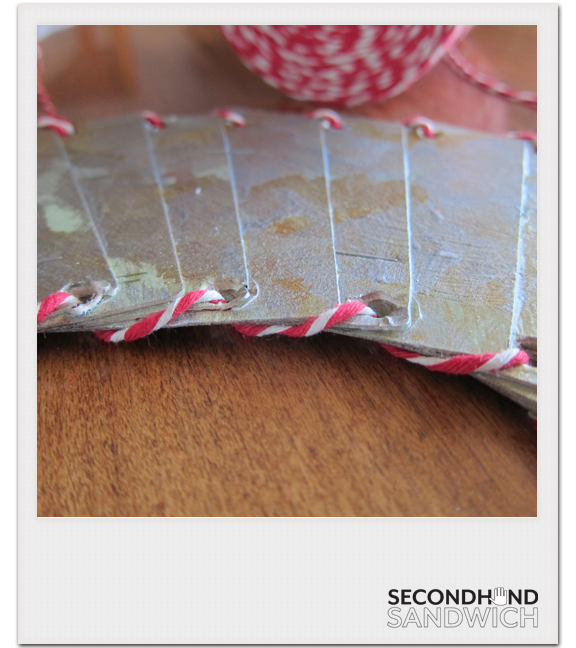
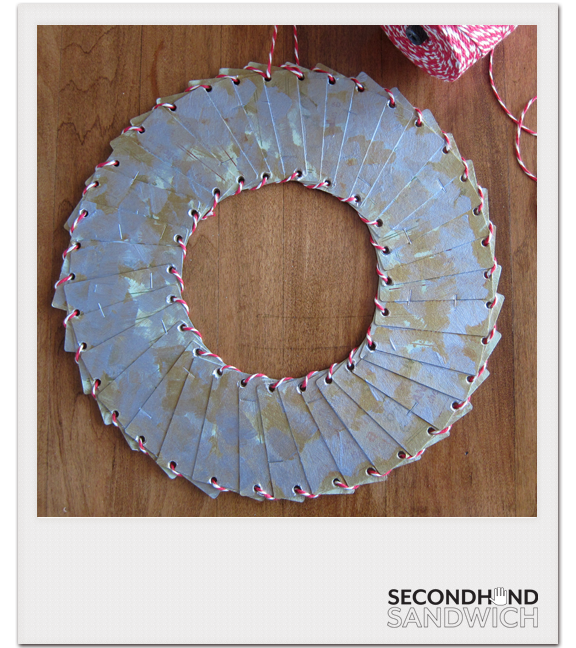
    Coasters, square or circular (I used 36)

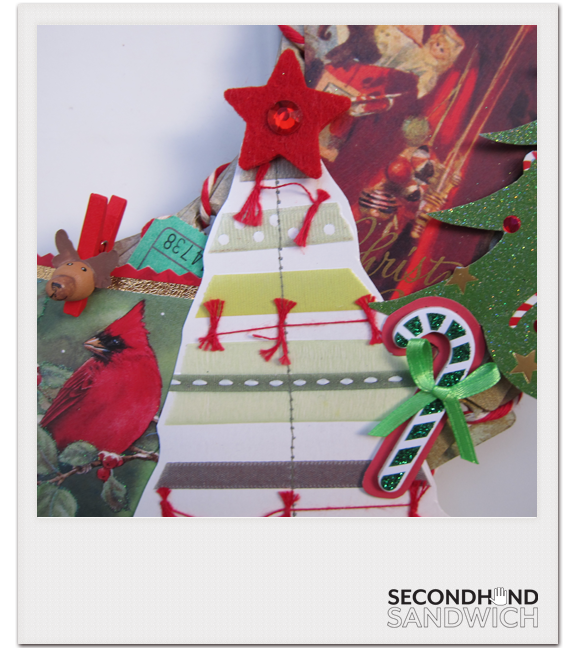
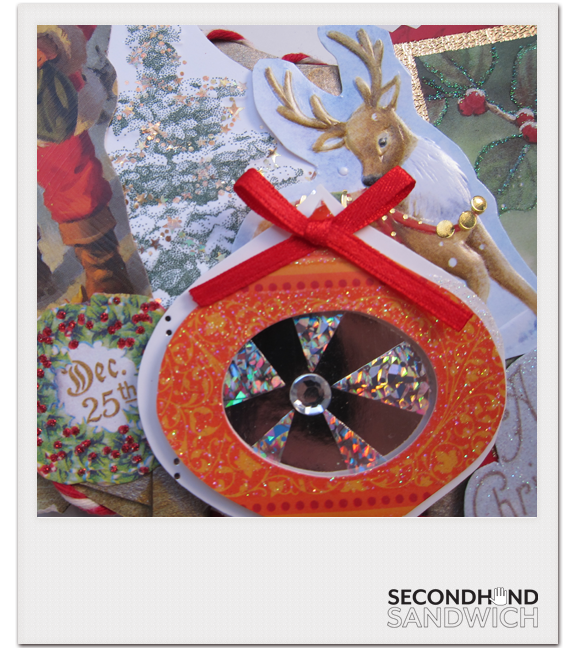
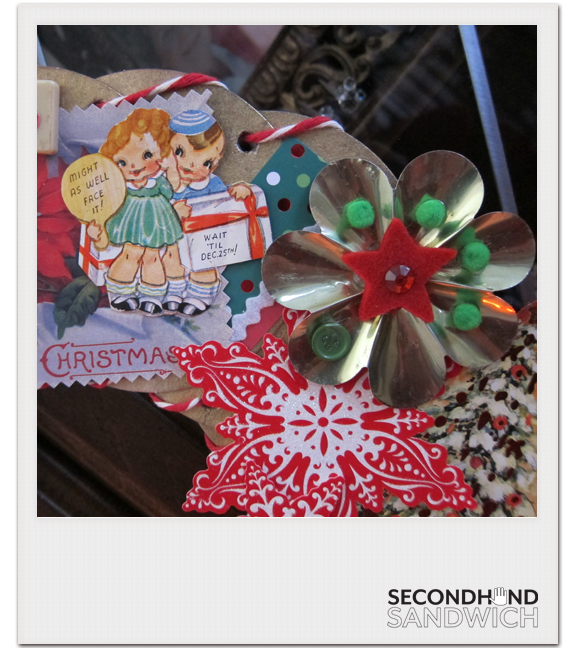
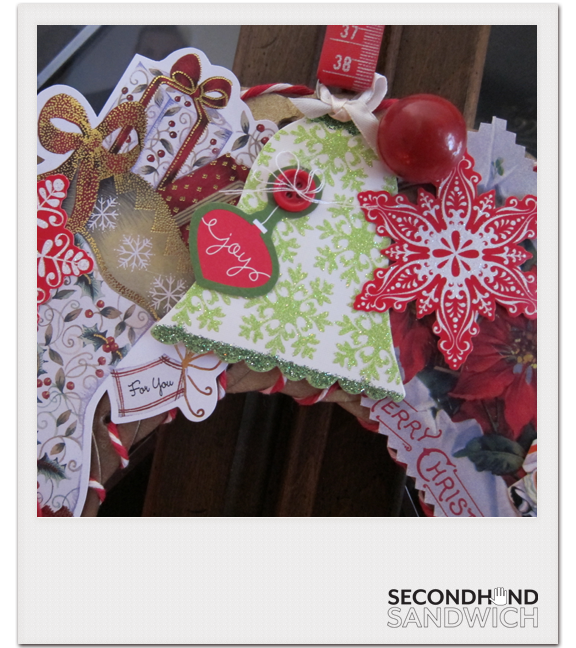
    Old Christmas cards, especially ones with 3-D objects or embossing or foiling

    Stapler, Scissors, Adhesive

    Acrylic Paint, Paintbrush AND/OR Spray Paint

    Cute Twine


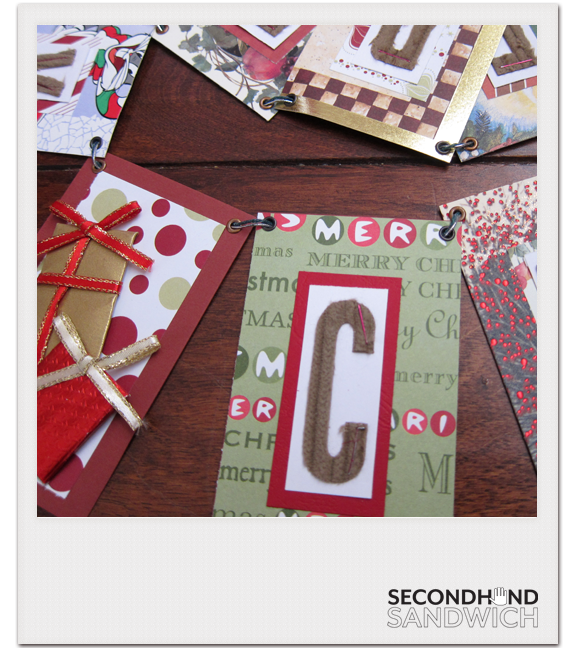
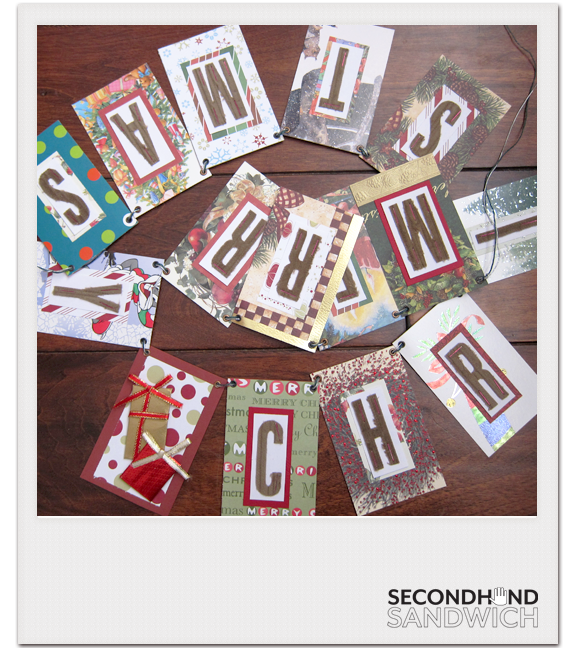
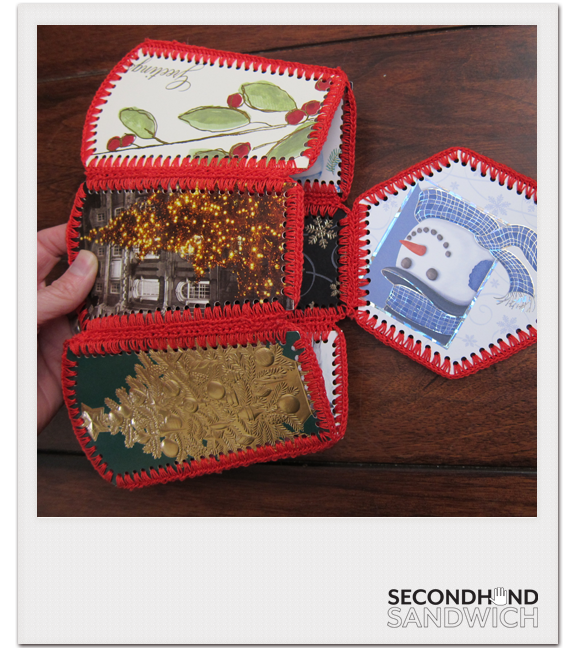
1. Cut shapes out of the cards. I went for anything with textured, 3D, embellished, embossed, or foiled areas.

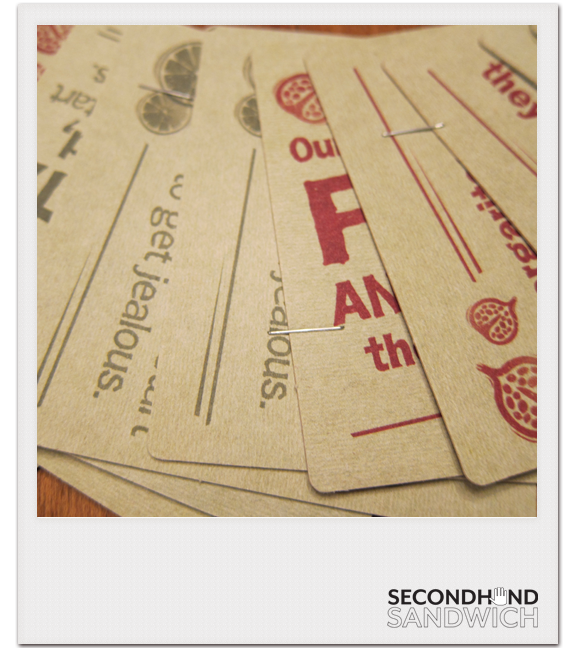
 2. Arrange the coasters in a loose circle to figure out the size of wreath you can make. Staple the coasters together any way you want.

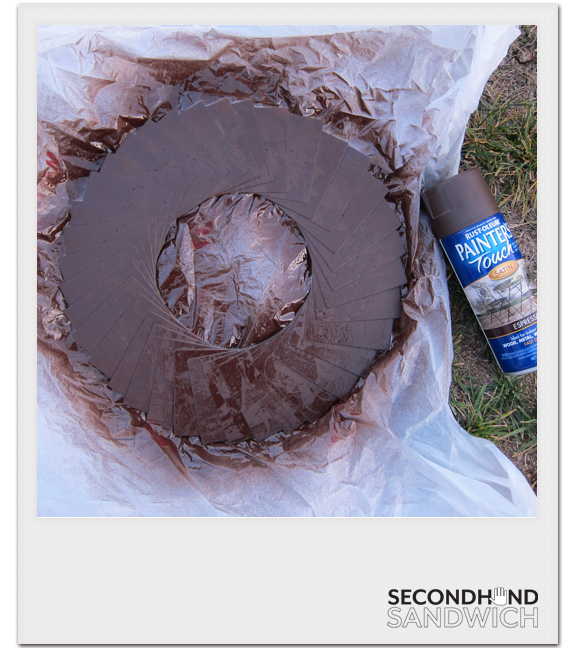
3. Spray paint the back of the wreath (in case you hang it in a window or something).

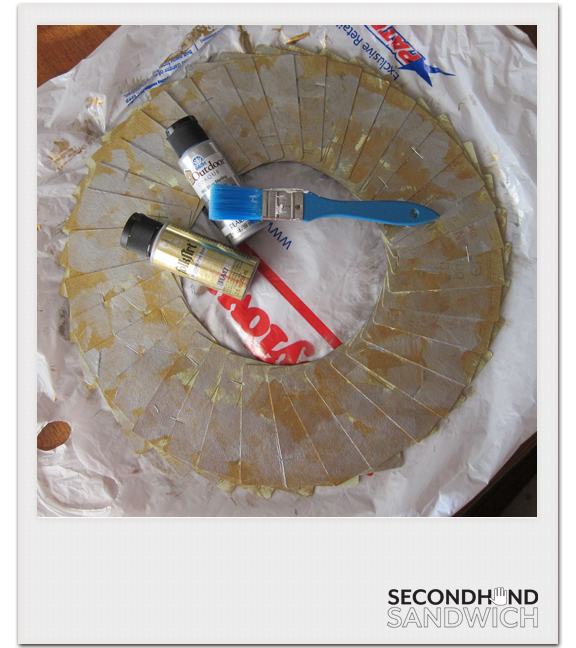
4. Paint the front of the wreath if you need to. Only the edges will end up showing, but I had the paint and used it.

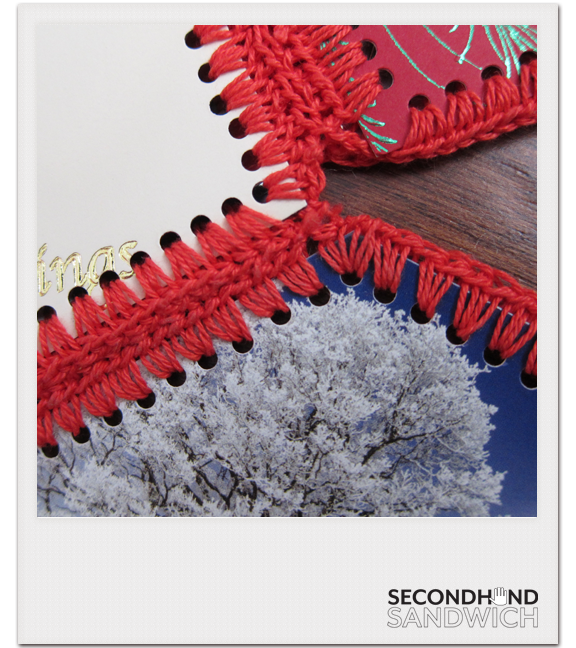
5. Punch holes around the wreath and lace with twine. (Like a giant lacing card!)

6. Adhere the pieces of Christmas cards in layers. I used Terrifically Tacky Tape for the flat layer and some foamy raised tape for the pieces that stick out.


I think Anthropologie should hire me to make these for them and that they should retail for $268. Except that this took me two days to make. If a card you sent me is on the wreath: thank you!  

Wednesday
Nov282012

Vintage Salt Shaker = Glitter Dispenser


A gift from Kate at Pome. Pretty much the cutest thing I've ever seen. The circle "lid" is adhesive and keeps the glitter from falling out everywhere.

I have some superfluous restaurant-style salt shakers that I was hoping to put homemade bay leaves in for neighbor gifts this year, but my basil leaves, when dehydrated, are as fragile as flakes of mica. I will have to figure out how McCormick makes their bay leaves so thick and glossy and sturdy another year...

Tuesday
Nov202012

"Merry Christmas" Garland from Old Christmas Cards $0


This one is super easy. You just have to crop old Christmas cards!

I had a corduroy alphabet sticker set that I used for the letters, but you could just as easily print letters on your computer or stamp them. I mounted each letter to a piece of cardstock and then double-mounted that onto old Christmas cards. Set eyelets in the corners (or just punch a hole) and string some waxed floss or whatever thready-type stuff you want through the holes! It's a hodge-podge way to showcase all the neat cards people send.

Tuesday
Nov202012

Hemstitched Bucket from Old Christmas Cards $0


I glued Christmas cards back-to-back and then created a template that would make a 6-sided bucket. I tapered the ends a little so it would open like a popcorn bucket. To make the bottom piece I just measured the base of the tall piece and created a hexagon with that same length on each side. Once you have six wall pieces and a base hexagon punch holes all along the perimeter. I have a little hand punch that I used that makes a hole 1/8" wide.

After all the holes are punched you hemstitch them. Hemstitching is like mini-crochet. I learned at a class at church, but I'm sure you can google it. Just pretend the Christmas cards are flannel and that you are edging a little burp cloth. All I did was two single crochets in each hole with an extra chain to help me reach the next hole. Super easy. And I know there are great tutorials online for single crochet. You just use hemstitching yarn (it's skinnier than regular yarn) and the tiniest crochet hook (a #1 hook).

Once you have crocheted every piece whipstitch the pieces together with the same yarn. I only attached the base on one side so that the bucket could fold flat for storage.

I just like making things with junk while I watch TV. I put our napkins in this bucket on the kitchen table for the month of December. Once I put shiny bulbs in it. Pinecones would be neat. Or candy.